TL;DR
- One command installs OpenClaw; you’re talking to the agent in the terminal within 10 minutes
- Codex is currently available through your ChatGPT plan (quota depends on your tier), so most personal setups don’t need a separate API key
- The agent can read/write files, execute shell commands, and maintain persistent memory — running 24/7 in the background
- Once connected to Discord, you can trigger tasks from your phone via chat
- Install this in an isolated environment — the agent has system-level access, and the risks are real
Why Technical Leaders Should Pay Attention to Self-Hosted Agents
Cloud AI services (ChatGPT, Claude, Gemini) have solved the “can I use AI” problem. But for enterprise use cases, three needs remain unmet:
- Data sovereignty: Operation logs, file access, and agent memory stay on your own machine (though inference still goes to the model provider unless you wire in a self-hosted LLM)
- Persistence: The agent runs 24/7 — it’s not a session you open, use, and close. It accumulates context and working memory over time
- System integration: Direct file system access, command execution, and integration with internal tools — no API sandbox constraints
OpenClaw is one of the most actively developed open-source projects in this space. Here’s what the actual deployment looks like.
What Is OpenClaw
OpenClaw is an open-source AI agent framework designed to run on your own infrastructure as a personal AI assistant. The key differences from cloud services:
| Cloud AI Service | Self-Hosted Agent (OpenClaw) | |
|---|---|---|
| Data storage | Vendor servers | Your VM |
| Conversation memory | Cleared at session end | Persistent and cumulative |
| System access | API sandbox | Full shell / file permissions |
| Availability | Depends on vendor | You control it |
| Extensibility | Limited to platform features | Community Skills (50+ integrations) |
| Communication channels | Web interface | Discord / Telegram / WhatsApp / iMessage |
In short: it has system-level permissions and can actually execute tasks — not just chat.
Risk Isolation Before You Deploy
Part 1: Installing OpenClaw
Here’s the full walkthrough from zero to a running agent on an Ubuntu VM.
Prerequisites
| Item | Notes |
|---|---|
| VM environment | Ubuntu 22.04+, minimum 1 CPU / 1GB RAM recommended |
| Node.js | 22+ (the install script handles this automatically) |
| ChatGPT account | For OpenAI Codex OAuth login |
Running the Install Script
SSH into your VM and run one command:
curl -fsSL https://openclaw.ai/install.sh | bash
The script auto-detects your environment, installs Node.js if needed, and then drops you into an interactive onboarding flow.
The first screen asks you to acknowledge the risk disclaimer — after all, you’re granting an AI agent system access:
◇ I understand this is powerful and inherently risky. Continue?
│ Yes
Next, choose your onboarding mode. QuickStart covers most scenarios:
◇ Onboarding mode
│ QuickStart
QuickStart sets these defaults:
Gateway port: 18789
Gateway bind: Loopback (127.0.0.1)
Gateway auth: Token (default)
Direct to chat channels
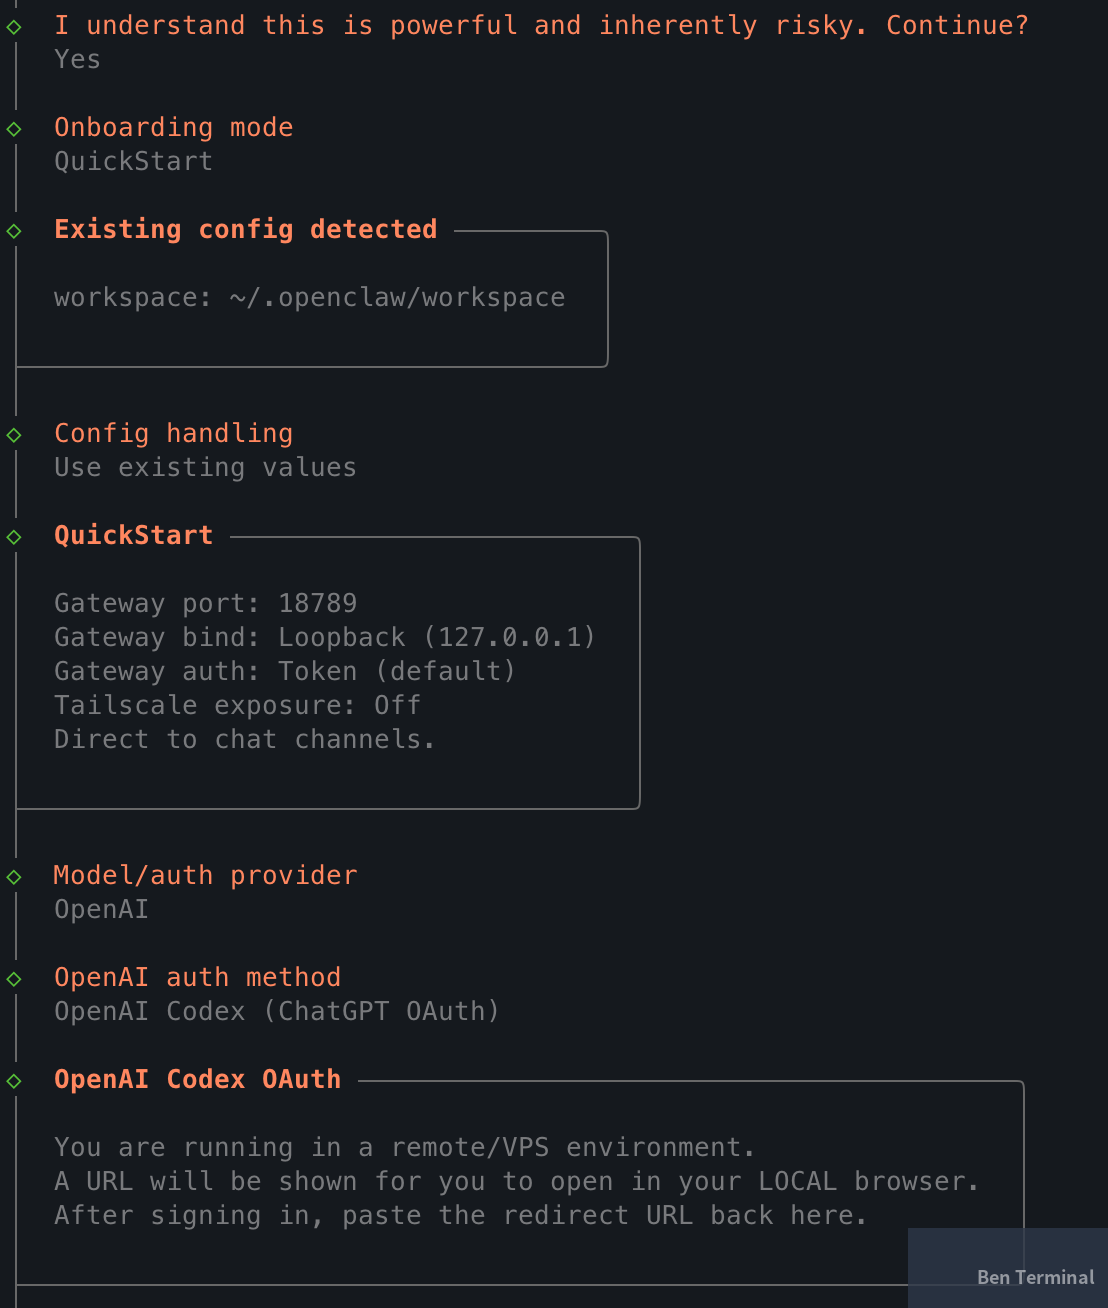
Choosing a Model: OpenAI Codex via ChatGPT OAuth
OpenClaw supports multiple models (OpenAI, Gemini, Claude, etc.) via API key. Right now, the lowest-friction path is OpenAI Codex + ChatGPT OAuth:
- OpenClaw’s official docs include a direct ChatGPT account login integration
- Codex is currently accessible through ChatGPT plans (Plus / Pro / Business, etc.), so most use cases don’t require a separately billed API key — though quota and policy may change, so check the official documentation
- The default model, gpt-5.3-codex, has been reliable in practice
The login flow works through ChatGPT OAuth:
- The installer generates an OAuth URL
- Since the VM typically has no browser, copy the URL and open it in your local machine’s browser
- Authorize with your ChatGPT account
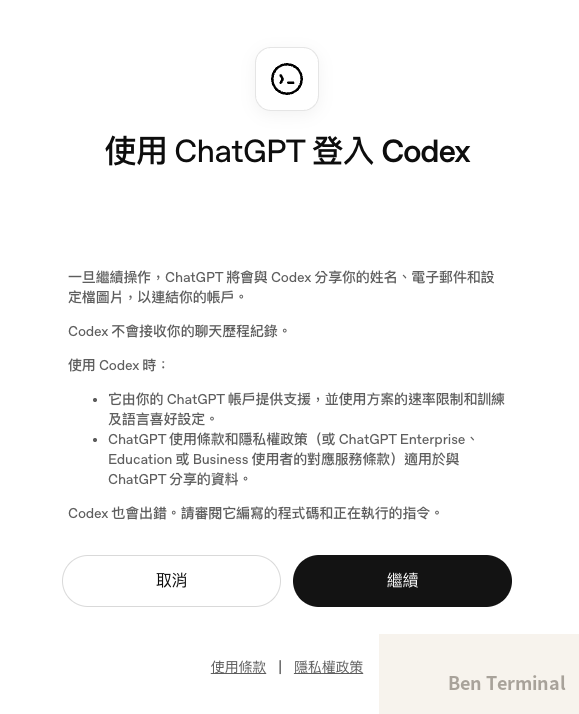
- After authorization, the browser redirects to
localhost:1455/auth/callback?code=... - Paste that full redirect URL back into the terminal
Once done, you’ll see the model confirmation:
◇ Model configured
│ Default model set to openai-codex/gpt-5.3-codex
Channel Setup (Skip for Now)
Onboarding will ask which channel to connect (Discord, Telegram, etc.). You can Skip this — it’s easy to configure later once the agent is running.
Hooks
Hooks trigger automated actions on specific events. Three worth enabling from the start:
| Hook | What it does |
|---|---|
| boot-md | Executes BOOT.md when the gateway starts |
| command-logger | Logs all commands to an audit log |
| session-memory | Auto-saves session context on /new (other lifecycle events can be extended via hooks) |
◆ Enable hooks?
│ ◼ 🚀 boot-md
│ ◼ 📝 command-logger
│ ◼ 💾 session-memory
Systemd Service
On Linux, OpenClaw automatically sets up a systemd user service and enables lingering, so the agent keeps running after you log out:
Installed systemd service: ~/.config/systemd/user/openclaw-gateway.service
Enabled systemd lingering for ubuntu.
The agent will keep running in the background even after your SSH session drops.
Starting the Agent
The final step: choose how to launch your bot:
◆ How do you want to hatch your bot?
│ ● Hatch in TUI (recommended)
│ ○ Open the Web UI
│ ○ Do this later
TUI is the straightforward option — you interact directly in the terminal with no extra setup. Web UI requires port forwarding to access from your local browser, which is one more thing to configure.
Once in the TUI, OpenClaw sends the agent its first message: “Wake up, my friend!” — kicking off initialization. It’ll ask a series of preference questions; the more detail you give here, the more effectively the agent will match your working style.
Installation is complete.
Common Commands
# Check agent status
openclaw status

# Health check
openclaw doctor

# Terminal UI
openclaw tui

# Open Web UI (token appears in the output)
openclaw dashboard

# Restart the Gateway service
openclaw gateway restart
Part 2: Wiring Up a Discord Bot (Optional)
Once the agent is running, the natural next step is connecting it to a communication channel you actually use — so you can give it instructions without SSH-ing into the VM. OpenClaw supports several options:
| Channel | Best for |
|---|---|
| Discord | Open Bot API, fine-grained permission control, thread/channel routing |
| Telegram | Lightweight, great for personal use, simple Bot API |
| Teams already using WhatsApp Business | |
| LINE | Primary choice for users in Taiwan and Japan |
| iMessage | Apple ecosystem users |
I’m using Discord for this walkthrough because its bot permission model is the most complete — you can configure channel allowlists, requireMention, and thread isolation. Other channels follow similar logic; the main difference is each platform’s bot registration process.
Creating a Discord Application
Go to the Discord Developer Portal:
- New Application → give it a name (e.g.,
openclaw) - Go to the Bot tab → Reset Token → copy the token (you’ll set it via CLI later — don’t paste it in chat)
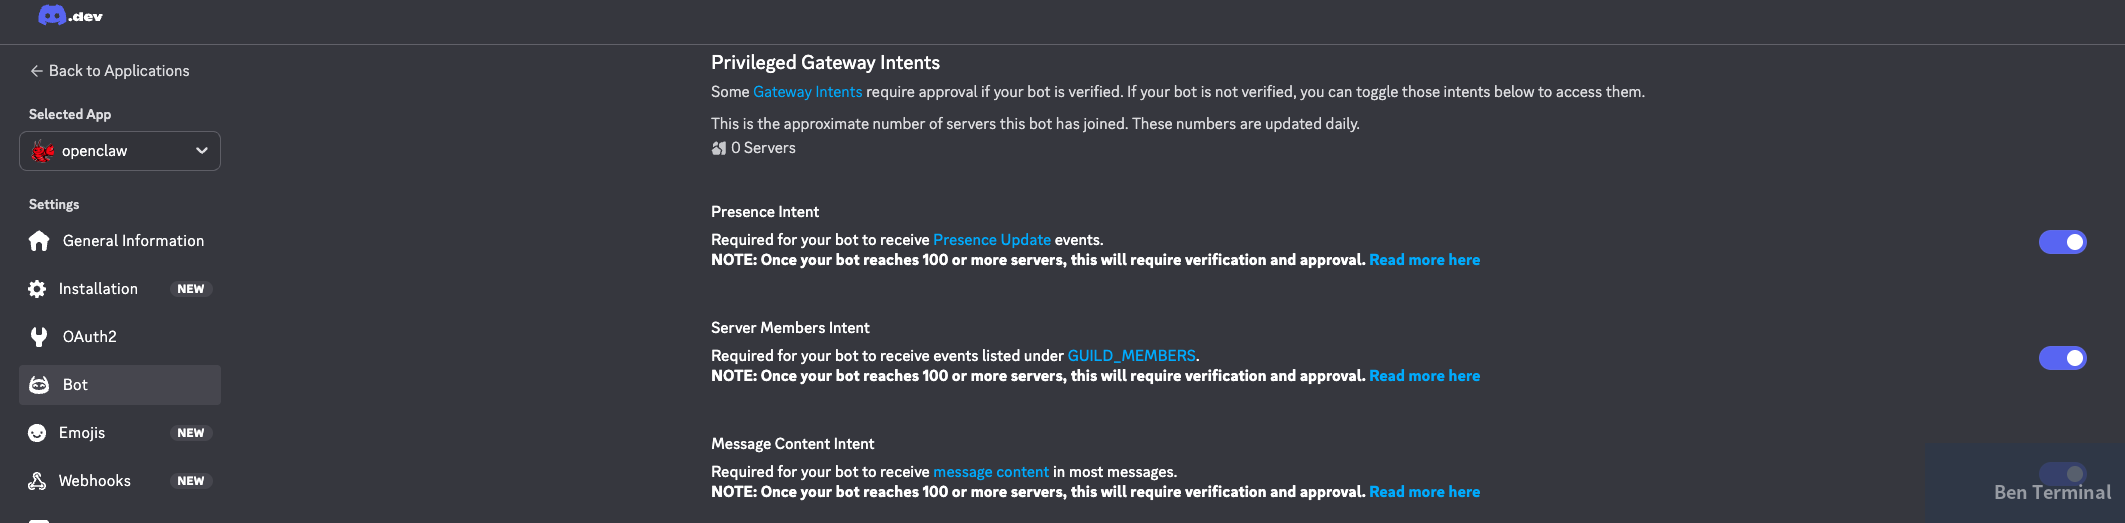
Enabling Privileged Gateway Intents
On the Bot page, enable the intents you need:
| Intent | Required? | Notes |
|---|---|---|
| Message Content Intent | Required | Without this, the bot can’t read message content |
| Server Members Intent | Recommended | Used for pairing and member interactions |
| Presence Intent | Optional | Only needed if you require presence updates |
Configuring OAuth2 Scope and Permissions
Go to OAuth2 → URL Generator:
Scopes — check:
botapplications.commands
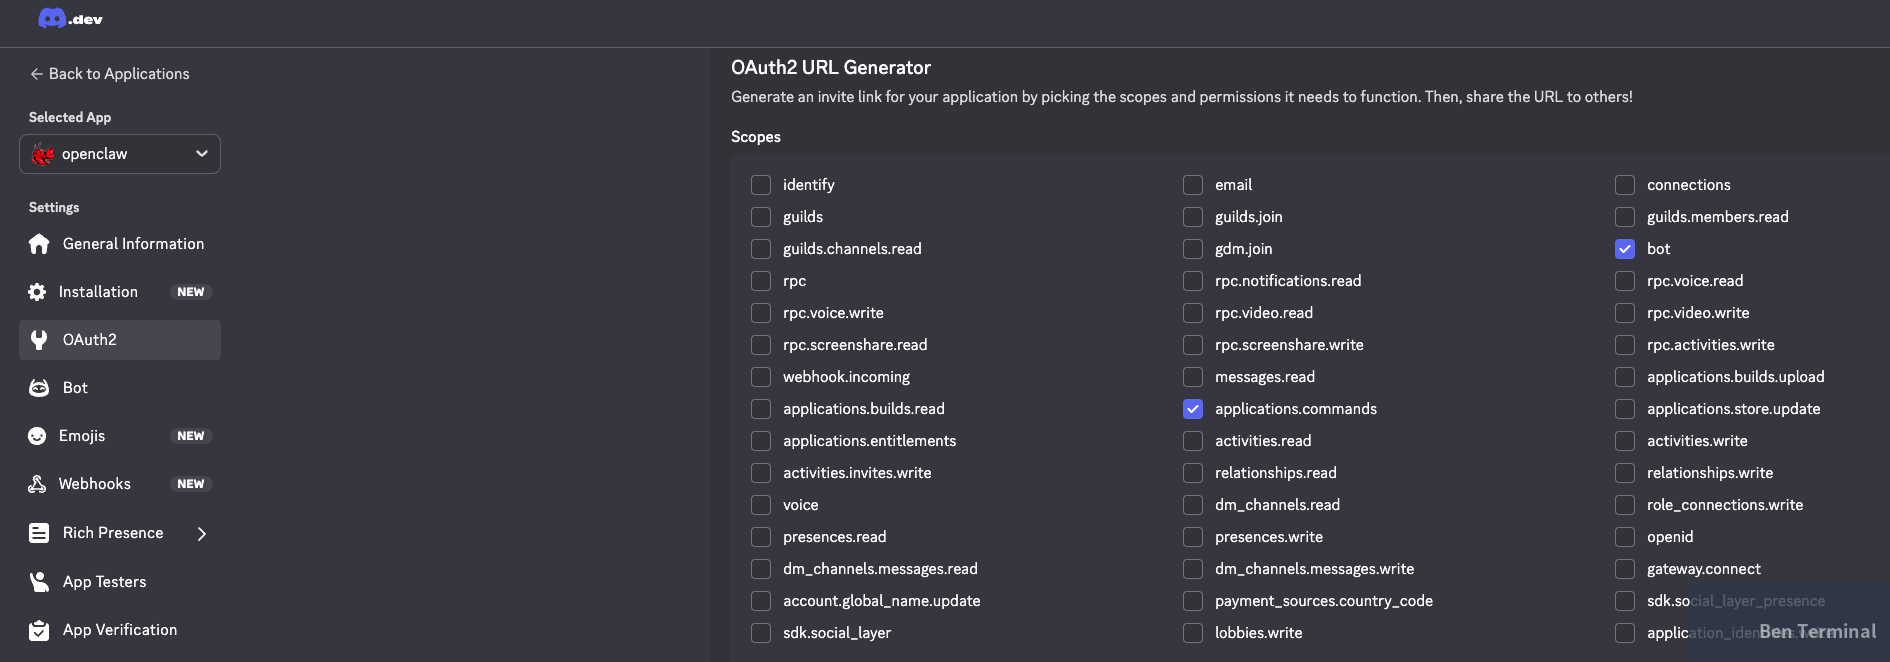
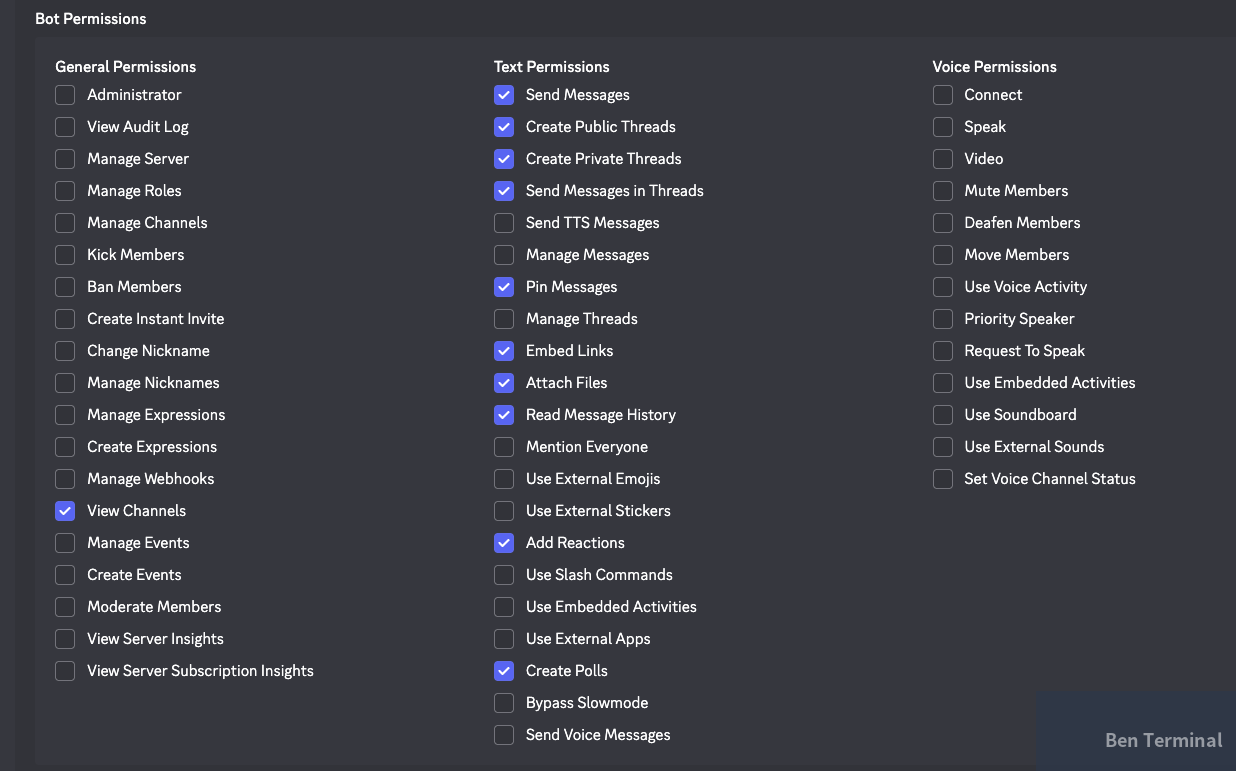
Bot Permissions — follow least privilege: start with the minimum viable set:
| Level | Permissions |
|---|---|
| Baseline (minimum viable) | View Channels, Send Messages, Embed Links, Attach Files, Read Message History |
| Only if you need advanced features | Create Public/Private Threads, Send Messages in Threads, Pin Messages, Add Reactions, Create Polls |
Inviting the Bot to Your Server
At the bottom of the page, copy the generated invite URL. Open it in a browser, select Guild Install, choose your server, and complete the invite.

Configuring Discord in OpenClaw
Once the bot is created and invited to your server, you can hand the rest of the setup to the agent itself.
Set the token via CLI first:
openclaw config set channels.discord.token '"YOUR_BOT_TOKEN"' --json
openclaw config set channels.discord.enabled true --json
openclaw gateway restart
Then open the TUI and let the agent handle the rest:
openclaw tui
For example, you might say:
“I’ve set up the Discord token. Please finish the Discord setup. Only respond in the #ai-assistant channel, and only when @mentioned.”
OpenClaw will modify the config files, set the channel allowlist, and restart the Gateway on its own. You just review what it did.
That’s the point of a self-hosted agent — it can edit its own config files and restart services, cutting out the manual steps. For more on the broader question of what it means to give AI access to your systems, see: When AI Learns to Open Your Drawers.
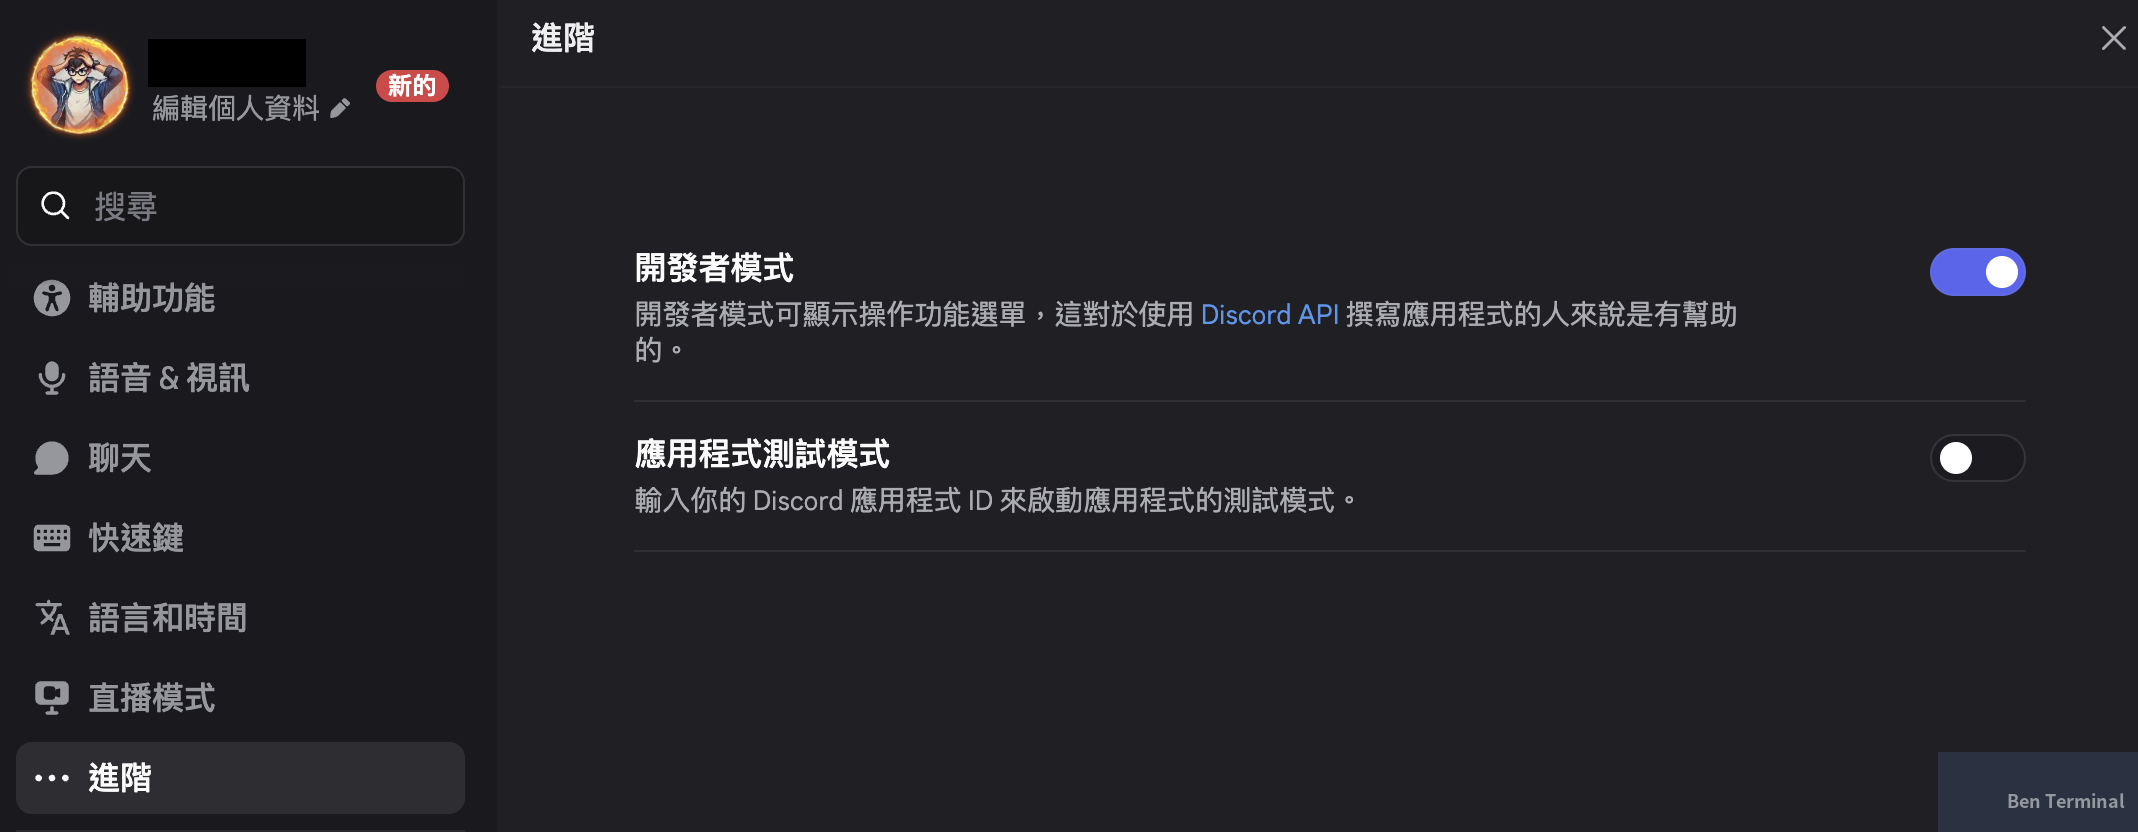
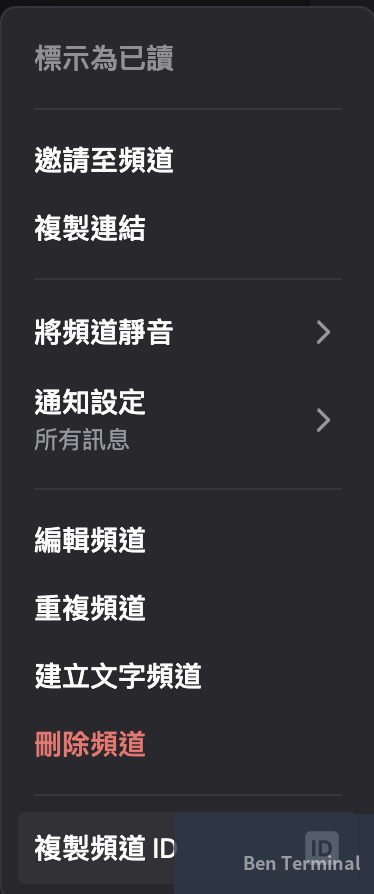
During setup, the agent may ask for a Channel ID, Server ID, or User ID. Enable Developer Mode in Discord settings, then right-click on any channel, server, or user to copy the ID:
Field Observations: Who This Is (and Isn’t) For
After running through a full deployment cycle, a few things stand out:
Use cases where this works well:
- Personal or small team AI assistant that needs persistent memory and system access
- Teams with existing VM infrastructure who want to integrate an AI agent into existing workflows
- Situations where data sovereignty matters — operation logs and file access stay on-prem, though note: unless you’re running a self-hosted LLM (e.g., Ollama), conversation content still goes to the model provider
The reality of the permission model:
At the OS level, it’s still close to all-or-nothing — the agent can run shell commands and read/write files. OpenClaw does provide some governance mechanisms: channel routing, pairing, guild/channel allowlists, requireMention, and action gates. But these are not a substitute for VM or container isolation
.
What’s already there vs. what enterprise deployments still need:
| Already present | Still needed for enterprise |
|---|---|
| command-logger (audit foundation) | RBAC / fine-grained permission tiers |
| Channel allowlist / pairing | Approval workflows (human-in-the-loop) |
| Hooks extension mechanism | Centralized secrets management |
| Discord least-privilege setup | SIEM / centralized logging |
| Environment separation (dev / staging / prod) |
A gotcha with Discord memory behavior:
Guild channels don’t automatically load MEMORY.md (DMs behave differently). If you want the agent to maintain consistent instructions and preferences inside a Discord server, put key settings in AGENTS.md or USER.md, or manage them explicitly via memory tools. This directly affects what “persistent memory” actually feels like in practice.
Deployment readiness by stage:
| Stage | Recommended Environment | Governance to Add | Ready to ship? |
|---|---|---|---|
| Personal experiment | VM / container | None | Start now |
| Small team internal assistant | Dedicated VM + backups | command-logger, channel allowlist | Good for internal use |
| Department tool | Dedicated host + monitoring | Secrets management, centralized audit logs, pairing | Requires risk assessment |
| Enterprise production | Dedicated infra + environment separation | RBAC, approval workflows, SIEM, change management | Requires additional architecture work |
The core trade-off: a self-hosted agent buys you control and customizability. The cost is operational responsibility. If your team doesn’t have someone who can manage a VM and troubleshoot issues, a managed cloud option is probably more practical.
This is the first post in an OpenClaw series. Next up: BOOT.md customization, Skills extensions, and Web Search configuration.
Want to Deploy AI Agents Without Managing the Infrastructure?
If you’re evaluating self-hosted AI agent deployments for your team or organization — from environment planning and security isolation to channel integrations — we’ve done this in production.
Book a consultation → Lychee Intelligence
References (5)
- OpenClaw Official Installation Docs — docs.openclaw.ai
- OpenClaw Discord Channel Setup — docs.openclaw.ai
- OpenClaw Hooks Documentation — docs.openclaw.ai
- Using Codex with your ChatGPT plan — OpenAI Help Center
- OpenClaw Official Site — openclaw.ai